Creating a plugin
BulmaJS uses a simple plugin system allowing anyone to create their own and hook into the BulmaJS core. A BulmaJS plugin is a simple class with some static methods to integrate into the core's API. Within this short guide we're going to create a simple plugin that attaches a click handler to any element with the class click-me.
Setup
The first thing you need to do is create a new folder for your project. In this example we will call our folder bulmajs-click-me. You can structure this folder however you like. But we're going to use the structure below.
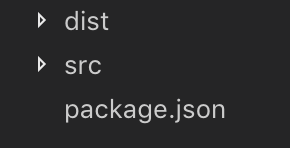
- dist This is used for our production ready files once they have processed (we're not going to cover this in this guide, there are many webpack (or other bundling tools) guides out there, and they'll do a better job of explaining that.)
- src This is where our source files will live.
- package.json This is our node package file
Installing dependencies
Your plugin will need to have a reference to the BulmaJS core. This will allow you to make use of the core API. If you publish your plugin on NPM, it is recommended to include a notice about using a bundler. Otherwise, your end user will be including multiple copies of the core.
To begin, install BulmaJS as a dev-dependency:
npm install --save-dev @vizuaalog/bulmajsCreating your plugin
Now our project is setup we can start creating our plugin. To start create a new file inside the src folder. For example ClickMe.js.
Open the newly created file and start by including the BulmaJS core:
import Bulma from '@vizuaalog/bulmajs/src/core';Now, create a new class representing your new plugin:
class ClickMe {

}
We now want to tell BulmaJS what class this plugin is responsible for. You can do this by specifying a static getRootClass method. BulmaJS will use this method to find and attach your plugin to the relevent elements.
static getRootClass() {
    return 'click-me';
}
Your plugin will also need a constructor which is responsible for setting up your plugin. A good use is for parsing the options object, or registering events. We're going to use the constructor to register our click event onto the element element provided via the options object. We will get back to how element is passed through later on.
constructor(options) {
    options.element.addEventListener('click', this.handleClick.bind(this));
}
Depending on what your plugin does you can now add the additional methods and logic to your class. In this example we'll also add our event handler.
handleClick(event) {
    alert('You clicked on an element with the class click-me');
}
The last thing our class needs is a method that is called by BulmaJS when the traverseDom method is called. This method will be passed the element that needs the plugin attaching to it. This is how we build our options object, we then return a new instance of our plugin. For this simple plugin, our handleDomParsing method will look like:
static handleDomParsing(element) {
    new ClickMe({
        element: element
    });
}
Finally, we need to register our plugin with Bulma and export our new module. This is why we needed access to the Bulma core at the beginning on this guide. You can also make use of the various helper methods used internally.
Bulma.registerPlugin('click-me', ClickMe);

export default ClickMe;
As of version 0.7 you can pass a third argument to registerPlugin. This specifies the priority of the plugin being called during the traverseDOM process. By default the core BulmaJS plugins have a priority of 0, increasing the priority of your plugin will have your plugin called before the core plugins. Omitting the priority argument will set the priority to 0.
This means our final ClickMe plugin file will look like:
import Bulma from '@vizuaalog/bulmajs/src/core';

class ClickMe {
    static getRootClass() {
        return 'click-me';
    }

    constructor(options) {
        options.element.addEventListener('click', this.handleClick.bind(this));
    }

    handleClick(event) {
        alert('You clicked on an element with the class click-me');
    }

    static handleDomParsing(element) {
        new ClickMe({
            element: element
        });
    }
}

Bulma.registerPlugin('click-me', ClickMe);

export default ClickMe;
You have now created your own BulmaJS plugin. A quick note about the BulmaJS import, if you do not self-register your plugin i.e. ask your users to register themselves, and you do not use any BulmaJS helper methods then you can remove the import, and NPM install.